5 Free Online Image Tools That Make Your Business Look More Professional
Published on Webosity:
You don’t need Photoshop, a graphic design degree, or a freelancer on retainer to make your business look professional.
Sometimes, you just need to remove an ugly background from a product photo. Or shrink an enormous image that’s slowing down your website. Or figure out which shade of blue actually looks good with your logo.
These aren’t complicated design problems. They’re everyday problems that small business owners, bloggers, affiliate marketers, and content creators run into constantly.
And fortunately, there are free online tools that can solve them.
Here are five worth bookmarking.
The 5 Best Free Online Image Tools at a Glance
| Tool | Best For | Free Option |
|---|---|---|
| Adobe Firefly | Removing photo backgrounds | Yes; free account and usage limits apply |
| TinyPNG | Compressing website images | Yes |
| Canva Color Palette Generator | Finding colors that match an image | Yes |
| Squoosh | Fine-tuning image compression | Yes |
| Coolors | Creating coordinated color schemes | Yes |
None of these requires you to become a graphic designer. That’s rather the point.
1. Adobe Firefly: Clean Up Product Photos in Minutes
Best for: Online sellers, affiliate marketers, and anyone who needs professional-looking product images.
Ever photograph something you want to sell, only to discover that your kitchen counter, carpet, or miscellaneous household clutter is competing with the actual product?
Adobe Firefly can help.
What It Does
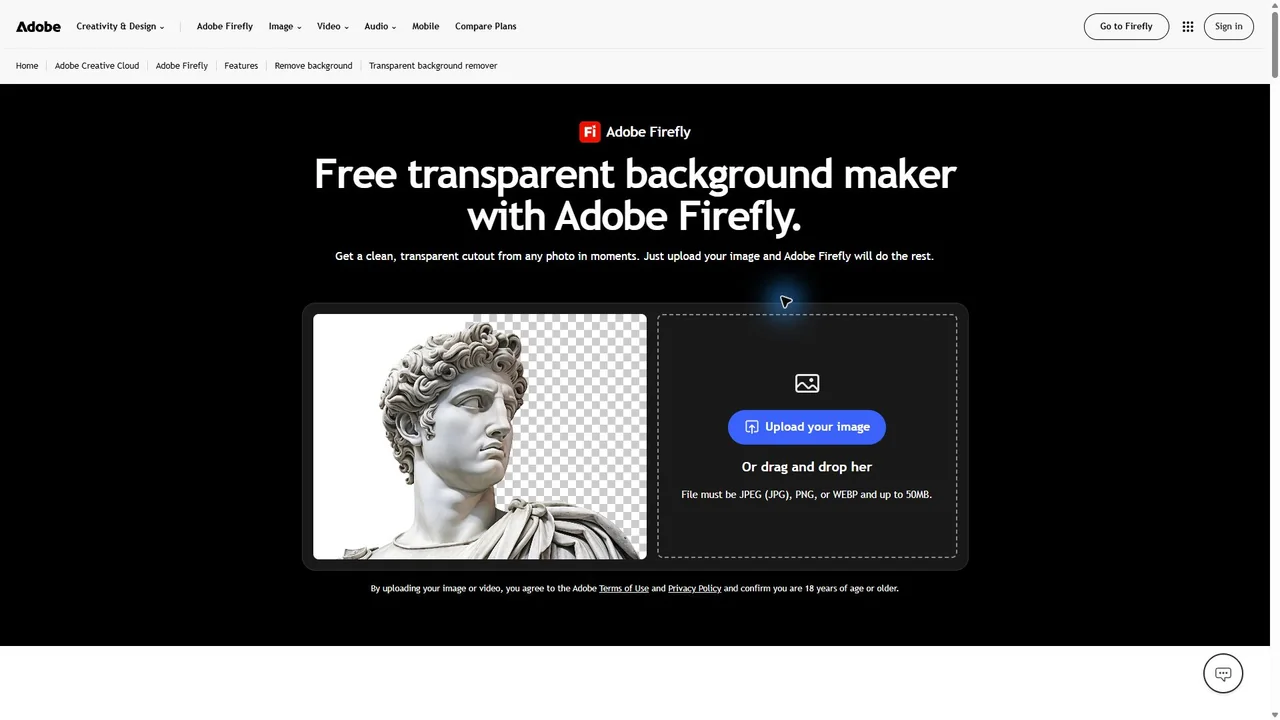
Firefly automatically identifies the main subject of an image and removes the background.
Download the cutout with a transparent background, then place it on a solid color or continue editing it to create a cleaner product presentation.
This is especially useful for Etsy and eBay sellers, small online stores, and creators promoting physical products.
How to Use It
- Open Adobe Firefly’s background remover and sign in with a free Adobe account.
- Upload your photograph. The tool accepts JPEG, PNG, and WebP files up to 50 MB.
- In the image editor, choose Remove Background from the Quick Actions menu.
- Download your cutout as a PNG with a transparent background.
- Place it on a neutral background in your preferred editor if you want a finished product image.
Webosity Tip: For product listings, try a white or light neutral background. A subtle shadow can help the product look grounded instead of floating in space.
Be careful with AI-generated backgrounds when selling actual merchandise. You don’t want to accidentally misrepresent the product.
What’s the Catch?
You’ll need a free Adobe account. Adobe offers limited free daily generations, and the allowance can change. Paid plans are available if you need more.
Your cutout downloads as a transparent PNG. Check the downloaded file’s dimensions before relying on it for a large product image; don’t assume it keeps the original resolution.
Adobe’s Firefly FAQ permits commercial use of Firefly outputs, subject to its terms. Use photos you own or have permission to edit, and check any restrictions shown in the product, especially for beta features.
Remove a background with Adobe Firefly
2. TinyPNG: Make Your Website Images Smaller Without Ruining Them
Best for: Bloggers, website owners, affiliate marketers, and anyone publishing lots of images.
Here’s something that can make an otherwise beautiful website feel terrible: enormous image files.
Your visitors don’t care that your homepage photograph is a masterpiece if it takes forever to load.
That’s where TinyPNG comes in.
What It Does
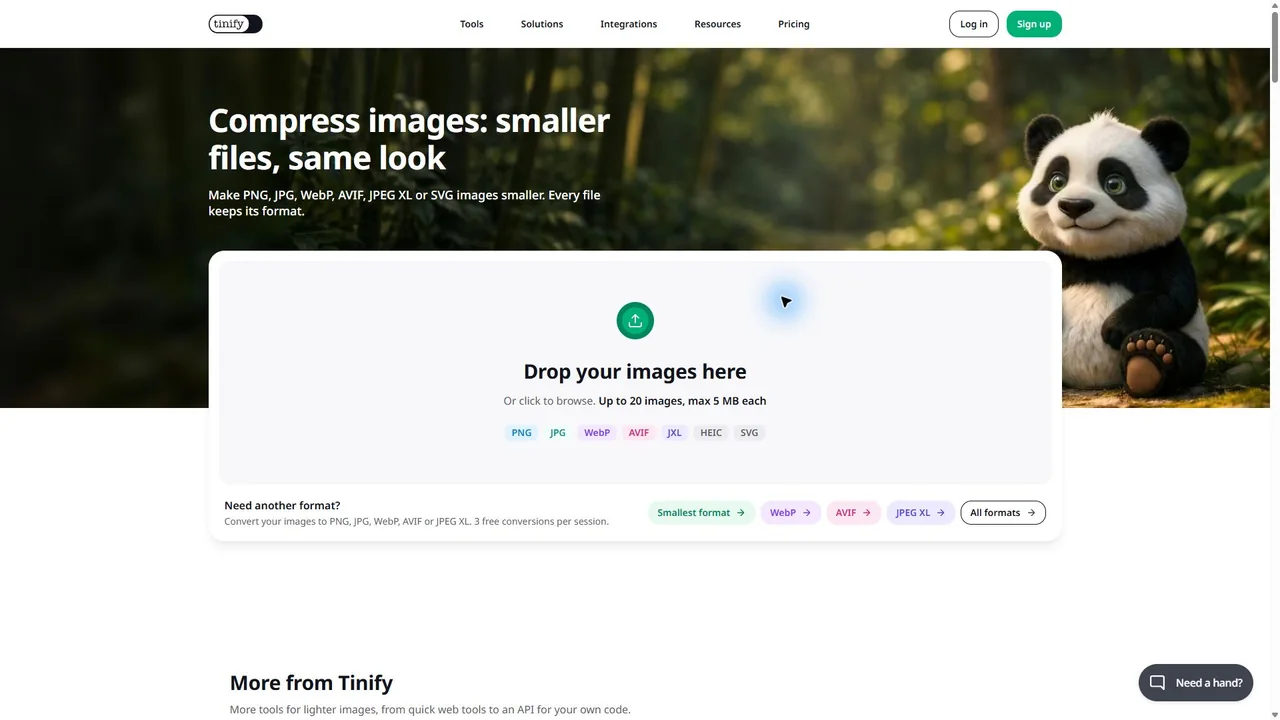
TinyPNG compresses images to reduce their file sizes while preserving as much visible quality as possible.
Smaller files can mean faster page loads, less bandwidth usage, and a better experience for visitors.
And because page performance matters for search visibility, optimizing images is a sensible part of website SEO.
How to Use It
- Open TinyPNG’s compression tool.
- Upload your images.
- Wait for compression to finish.
- Download the optimized files.
- Replace the oversized versions on your website.
If you need a different image format, TinyPNG also has a separate conversion tool.
Webosity Tip: Resize images to the dimensions you actually need before compressing them. There’s little point uploading a 4,000-pixel-wide photograph into a 400-pixel thumbnail slot.
What’s the Catch?
The free compressor supports up to 20 images per session, with a 5 MB limit per image.
Free format conversion has a separate three-image-per-session limit.
Paid plans offer larger files and higher-volume processing, but the free tools are useful for routine website work.
3. Canva Color Palette Generator: Find Colors That Actually Work Together
Best for: New websites, branding projects, social media graphics, and digital products.
You know that moment when you find the perfect photograph for your website, but none of your existing colors seem to match?
Or you have a logo you love, but absolutely no idea what colors should go with it?
Canva’s Color Palette Generator gives you a starting point.
What It Does
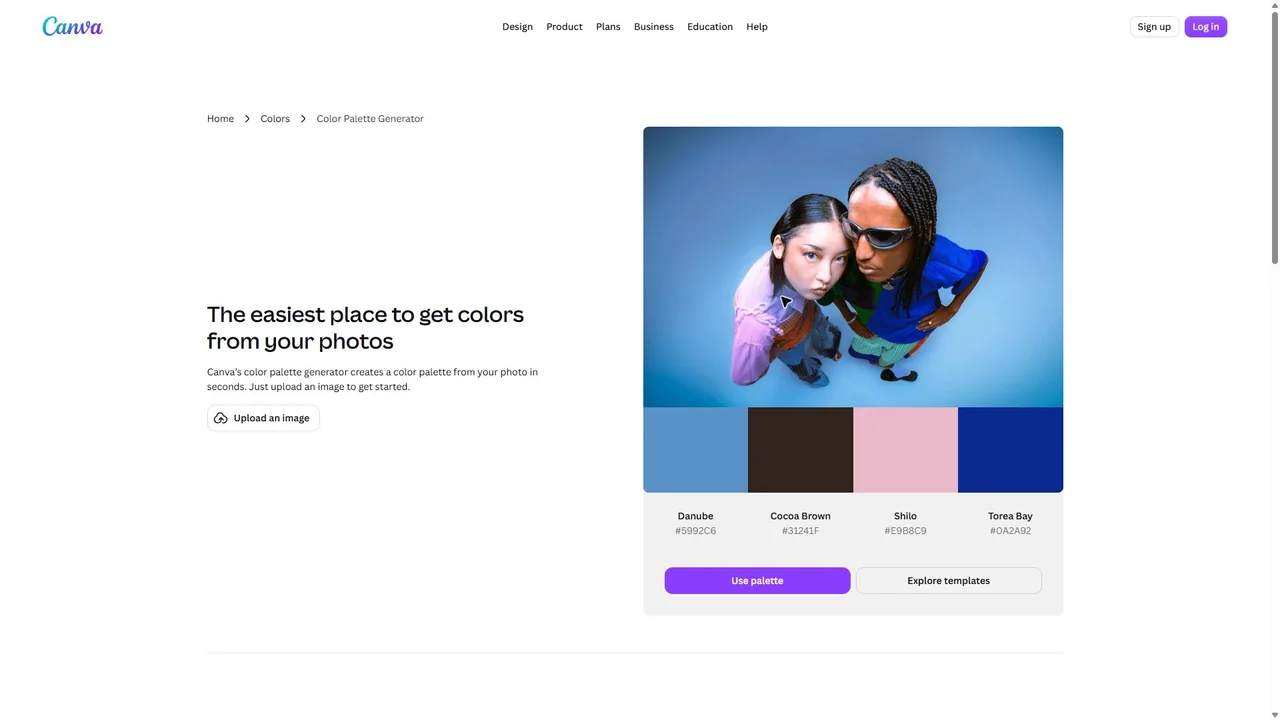
Upload an image and Canva extracts a coordinated selection of colors from it, complete with hexadecimal color codes.
Those little six-character codes are what you can use to reproduce the same colors in website themes, graphics, and other design tools.
How to Use It
- Open Canva’s Color Palette Generator.
- Upload an image containing colors you like.
- Review the generated palette.
- Copy the hexadecimal codes.
- Use those colors consistently across your website and marketing materials.
Webosity Tip: Pick one primary brand color, one accent color, and a few neutrals. You don’t need to use every color in the palette.
And make sure your text remains readable against its background. Pretty colors aren’t helpful if visitors have to squint to read your website.
What’s the Catch?
The basic generator is straightforward and free to use. More elaborate brand-management and design workflows may involve Canva’s broader paid features.
Find image colors with Canva’s Color Palette Generator
4. Squoosh: Take Control of Image Compression
Best for: Website builders, bloggers, and anyone who wants more control over image quality and file size.
TinyPNG is wonderful when you want to upload an image, compress it, and get on with your day.
But sometimes you want to see exactly what compression is doing.
That’s when I would reach for Squoosh.
What It Does
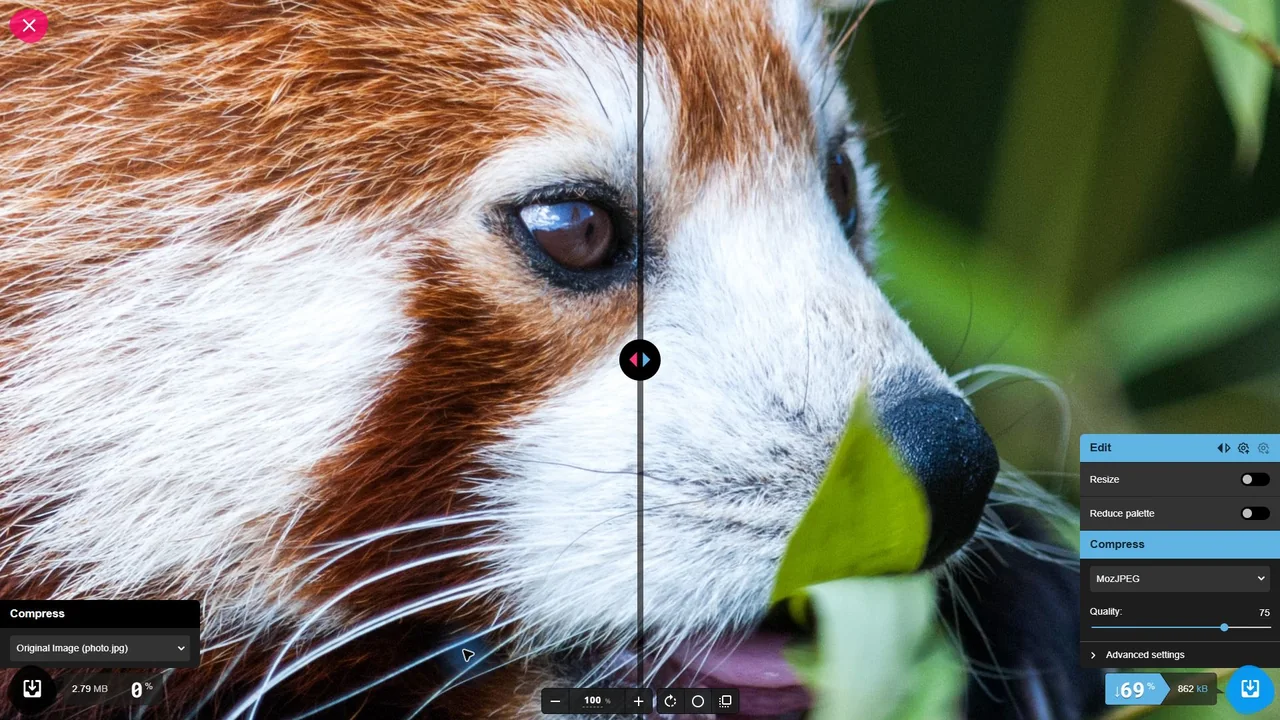
Squoosh is a free, open-source image optimizer that runs in your browser.
You can experiment with image formats, quality settings, and resizing options while comparing the result with your original image.
One particularly useful feature is the visual comparison slider.
You can see whether your compression settings are making the image look noticeably worse before downloading anything.
How to Use It
- Open Squoosh.
- Upload or drag in an image.
- Select an output format and adjust the available quality settings.
- Move the comparison slider to inspect the results.
- Compare file sizes and download the version you’re happy with.
Webosity Tip: Use Squoosh for important website graphics, especially large hero images. Try different settings until you find a good balance between visual quality and download size.
An image doesn’t need to be the smallest file imaginable. It needs to be small enough to load efficiently while still looking good.
What’s the Catch?
Squoosh is free and open source, but its extra controls mean there’s a little more to learn.
One nice privacy advantage: image compression happens locally in your browser rather than sending the image to a compression server.
Optimize an image with Squoosh
5. Coolors: Build a Brand Palette Without Overthinking It
Best for: Solopreneurs, website builders, content creators, and anyone who struggles to choose colors.
Of all the tools on this list, Coolors is the one I personally use the most.
When I’m building a new website or creating a one-off graphic and can’t decide on colors, I head over to Coolors.
It’s remarkably good at getting me unstuck.
What It Does
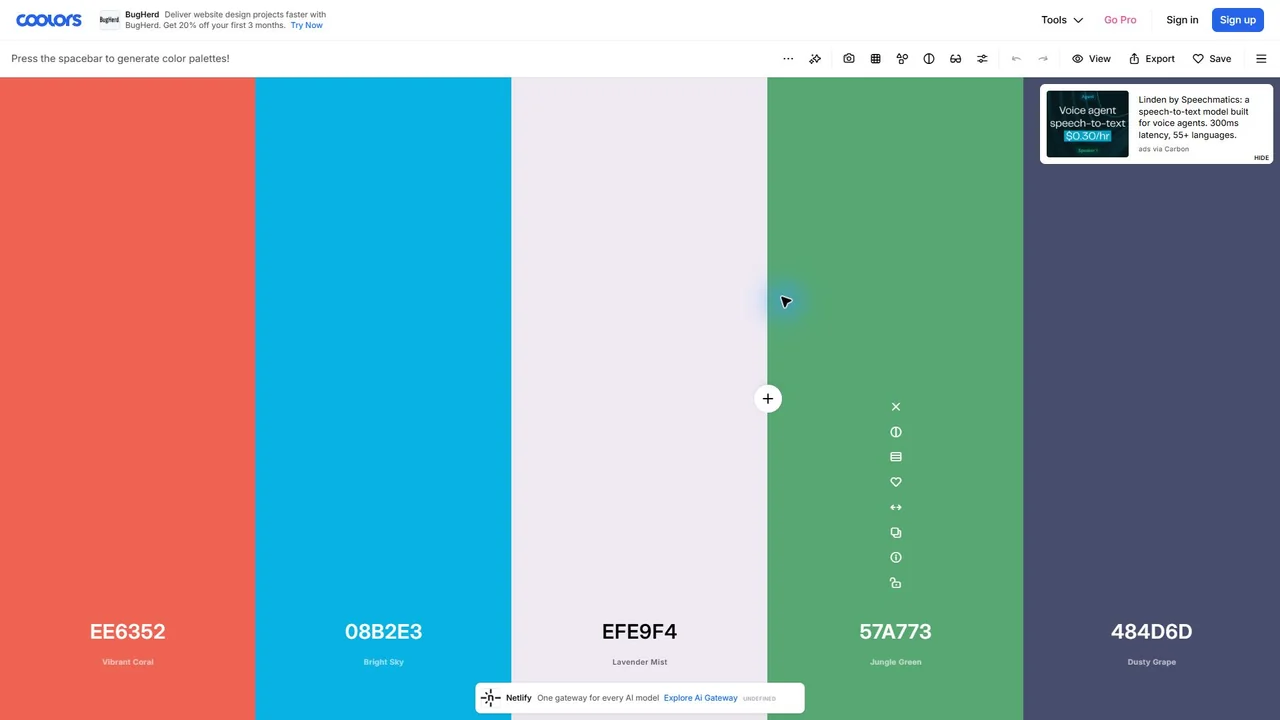
Coolors generates coordinated color palettes.
And the best part? You can keep generating new combinations simply by pressing the spacebar.
Find a color you love? Lock it in place.
Press the spacebar again, and Coolors generates new companion colors while keeping your favorite.
It’s a little addictive.
How to Use It
- Open the Coolors generator.
- Press the spacebar to generate a new palette.
- Lock any colors you want to keep.
- Continue generating combinations until you find one you like.
- Copy the hexadecimal color codes into your design project.
You can also explore existing palettes and extract colors from images.
Webosity Tip: Don’t choose colors based solely on how attractive they look together. Think about how they’ll function on a real website.
You need colors for backgrounds, headings, buttons, links, and readable text. A palette that looks fantastic in five vertical columns doesn’t necessarily make a usable website theme.
What’s the Catch?
Coolors has a genuinely useful free plan, but there are limits.
Some storage and advanced features require a paid plan. Check the current options on Coolors before relying on a particular feature.
For basic branding work, the free generator is plenty to get started.
Disclosure: The Coolors link in this article is an affiliate link. If you buy through it, Webosity may earn a commission.
Create a color palette with Coolors
Put Them Together: A Simple Product Image Workflow
Here’s how you could use several of these tools together to create a more polished product image without hiring a designer.
Step 1: Clean up your photo. Use Adobe Firefly to remove the distracting background from a photograph of your product.
Step 2: Choose your colors. Use Canva’s Color Palette Generator to extract colors from your logo, packaging, or another brand image. If you’re starting from scratch, try Coolors instead.
Step 3: Create your finished graphic. Place the product on a simple background using your chosen colors. Add a subtle shadow or a small amount of text if appropriate.
Step 4: Optimize the image. Run the finished graphic through TinyPNG, or use Squoosh if you want more control over quality and format.
Step 5: Publish. Upload the optimized image to your website, store, or social media account.
That’s it. A cleaner image, a more consistent look, and a smaller file that won’t unnecessarily weigh down your website.
Which Free Image Tool Should You Use?
If you’re trying to solve one specific problem, here’s where I’d start:
- Messy product photo? Adobe Firefly.
- Slow-loading website images? TinyPNG.
- Need colors to match a photograph? Canva Color Palette Generator.
- Want precise control over image compression? Squoosh.
- Starting a brand and can’t pick colors? Coolors.
You don’t need all five tools for every project.
You don’t even need to use them regularly.
But having them bookmarked means that the next time a small design problem interrupts your day, you have somewhere to start.
And that can save a surprising amount of time.
Personally, Coolors remains my favorite. I can spend far too long experimenting with color combinations, but it beats staring at a blank design wondering what looks good.
What’s your favorite free image tool? Have you found another one worth adding to the list?